
A well-built deck is more than just an outdoor platform — it’s an investment that enhances your property’s value, lifestyle, and curb appeal. Whether you’re a contractor or a DIY enthusiast, this guide walks you through the steps to build a durable, beautiful deck that stands the test of time.
Step 1: Plan Your Deck Like a Pro
- Purpose & Function: Entertaining, lounging, dining, or all of the above? This determines the layout.
- Location: Consider sun exposure, wind, privacy, and the view.
- Size & Shape: Stay proportional to your house and yard.
- Permits: Check with your local building authority for zoning laws and permits.
Step 2: Choose Premium Materials
- Frame: Use pressure-treated lumber (PT lumber) rated for ground contact for posts and beams. 6×6 posts are ideal for stability.
- Decking Boards: Choose premium pressure-treated or upgrade to composite for low maintenance.
- Fasteners: Use galvanized or stainless steel screws to prevent rust and corrosion.
- Footings: Concrete footings poured below the frost line ensure long-term stability.
Step 3: Prep the Ground and Foundation
- Mark the layout with string lines and stakes.
- Excavate for footings (typically 48″ deep in Ontario).
- Pour concrete and set your post anchors level and centered.
- Add gravel under posts for drainage.
Step 4: Build the Frame
- Set 6×6 posts using a laser level for even height.
- Install beams on top using carriage bolts or metal brackets.
- Attach joists using joist hangers spaced 16″ OC (on center).
- Add blocking for extra strength and to prevent twisting.
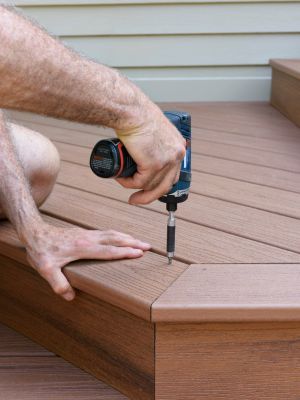
Step 5: Install the Decking
- Let boards acclimate for 24–48 hours before installing.
- Use a spacer (1/8″–1/4″) between boards for drainage.
- Start from the house and work outwards.
- Secure with hidden fasteners for a sleek, modern finish.
Step 6: Railings, Stairs & Skirting
- Add code-compliant railings (if deck is over 24″ high).
- Build sturdy stairs with stringers and proper rise/run.
- Use skirting or lattice to hide the underside of the deck and improve aesthetics.
Step 7: Protect & Maintain
- Wait 4–8 weeks before staining pressure-treated wood.
- Use a high-quality stain and sealant.
- Clean and reseal every 2–3 years.
- Check for loose boards or railings annually.
Pro Tips for a Premium Deck
- Use composite fascia boards for a clean finish.
- Consider adding deck lighting for nighttime use.
- Use a joist tape to extend the life of your frame.
- Install a drainage system underneath for dry storage below the deck.
Conclusion
Building a premium deck takes time, precision, and the right materials — but the result is a stunning, long-lasting outdoor space you’ll enjoy for years. If you’d rather trust the pros, reach out to Profixer.org. We build top-tier decks across the GTA, using only the best materials and craftsmanship.
Need a quote?
Call us at: 437-260-3272
Visit: Profixer.org
Serving Toronto and the GTA with pride.